
 I recommend you UnHackMe - Ultimate Malware Killer for fast malware removal:
Free Download Fully Functional 30-day Trial. No credit card is required.
Reviews. EULA. Privacy Policy. Uninstall.


 What is Ssllink.net?
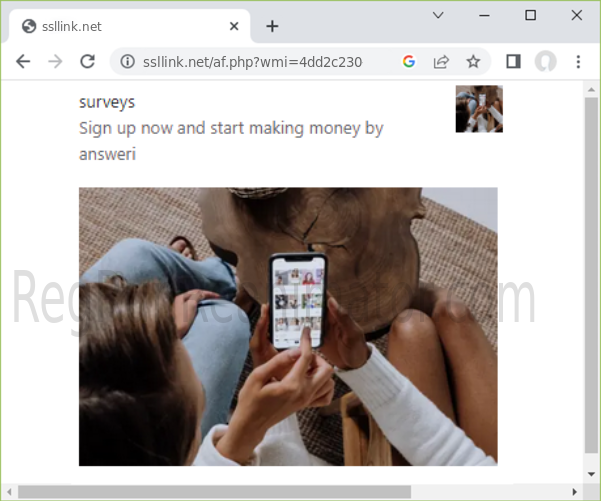
Ssllink.net site may harm your computer!
 Ssllink.net targets various web browsers, including Google Chrome, Microsoft Edge, Mozilla Firefox, Brave, Opera, Vivaldi, Safari, and Internet Explorer.
SSLLINK.NET infects web browsers.

The SSLLINK.NET risk level is Medium
Threat Summary:
Popup ads;
Browser Push notification spam;
Redirects to malicious websites;
Browser hijacking - changing the homepage, default search engine, and new tab settings.
Infected browser extensions;
Fake ad-blocking software;
Potentially unwanted applications;
Free games from an unknown producer.
Increases time to load websites;
Redirects to malicious websites;
Executes malicious scripts in the browser;
Downloads malware programs.
Ssllink.net is a website that bombards you with advertisements whenever you visit it.
It can slow down your computer and make it frustrating to browse the internet.
The good news is there are ways to avoid Ssllink.net and keep your computer running smoothly.
- STEP1: Remove SSLLINK.NET virus using UnHackMe - Ultimate Malware Killer
- STEP2: Confirm that the computer is virus-free with the UnHackMe support team
- STEP3: Remove the virus using Malwarebytes Antimalware
- STEP4: Protect against the virus using AdGuard
It is only for power users!
Remove the virus using UnHackMe - Ultimate Malware Killer

Now, it removes all types of malicious software.
The program is entirely free for 30 days (including the support).
You can check the real reviews of UnHackMe on Facebook.
Download and Install UnHackMe
- Download UnHackMe from the official website.
- Double-click on UnHackMe.zip.
Unzip all files from the zip to a new folder. - Double-click on the 'unhackme_setup.exe.'
- You will see a confirmation screen with the verified publisher: Greatis Software.
Choose 'Yes'. - Then, you have to accept the license agreement.
- Complete installation.
Complete UnHackMe installation.
Scan for SSLLINK.NET malware using UnHackMe
The first scan will start automatically.
Remove SSLLINK.NET malware
- Carefully inspect found items.
A red shield marks malicious items.
Suspicious items are yellow.UnHackMe automatically creates a System Restore point before fixing!
It is essential to have System Restore active to recover deleted files.Next, click the red button: Remove Checked!
- UnHackMe may ask for your confirmation to close all browsers.
Do it!
- If you want to quarantine files before deleting, check the box 'Use file safe deleting.'
- And after all, you will see the results of your scanning and fixing process:
- Restart your computer to complete the removal process.
Confirm that the computer is virus-free with the UnHackMe support team
- Open UnHackMe.
- Click the "Help in Removal" button on the main screen.
- Choose "Send us RegRunLog."
- Enter your e-mail, name, or nick.
- Describe your problem.
- Accept the Privacy Policy.
- Click the "Upload" button. You will receive the solution by e-mail within 24 hours.
Remove the virus using Malwarebytes Antimalware:
- Download Malwarebytes for Windows. Download Malwarebytes
- Double-click on the Malwarebytes setup file MBSetup.
Accept the User Account Control question.
- Follow the on-screen instructions to complete the Malwarebytes installation.
- Click on the Scan button.
Wait for the Malwarebytes scan to complete.
- Click on the�Quarantine�button to remove the malware found.
- Necessary: restart the computer to complete the removal.
Protect your computer against the "SSLLINK.NET" problem using AdGuard Ad Blocker
Adguard Ad Blocker:- Blocks all kinds of ads
- Removes annoying web elements
- Saves traffic and speeds up page loading
- Works for browsers and apps
- Maintains site functionality and appearance
- Download AdGuard
Download Adguard - When the download is finished, double-click on the file adguardInstaller.exe.
- Answer Yes to the question in the User Account Control dialog.
- Follow installer instructions.
- Click the Finish button.
- When the installation is complete, you will see the Quick Tour window.
- Click Let's do it! to start working with Adguard!
How to remove SSLLINK.NET virus manually?
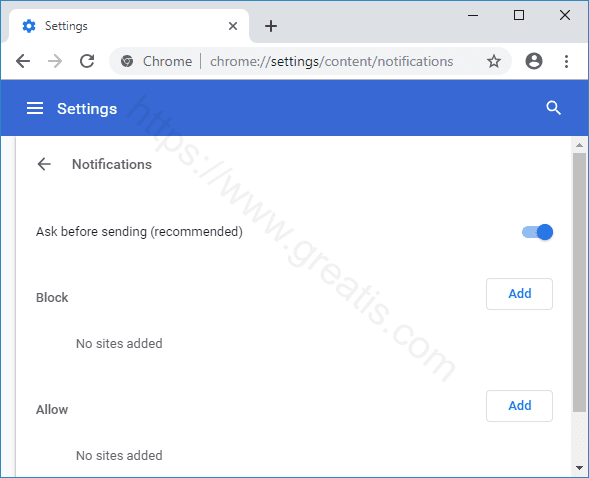
- Disable Web Push Notifications in your browser.
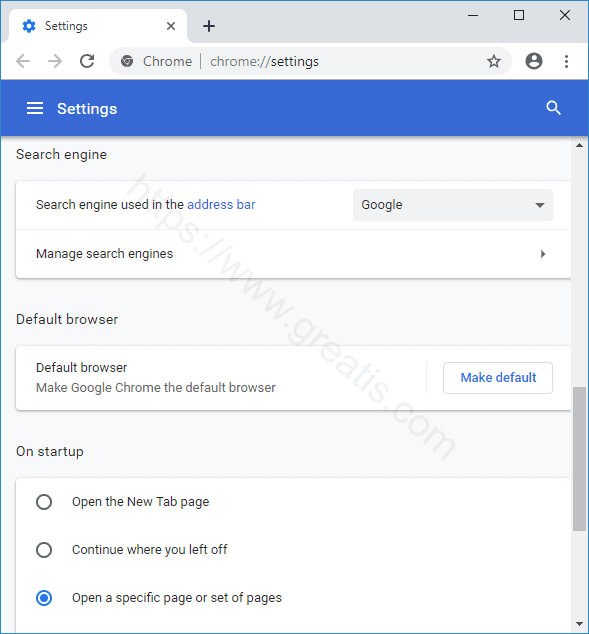
- After that, check the search settings and homepage of your browser. Reset them if needed.
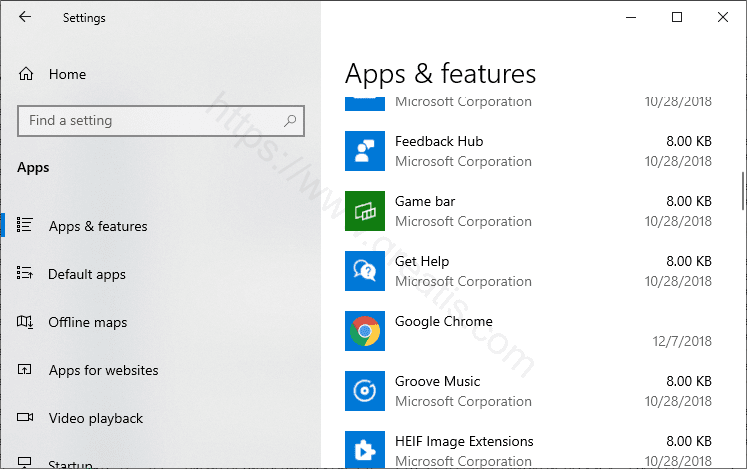
- Check recently installed apps and uninstall unknown apps.
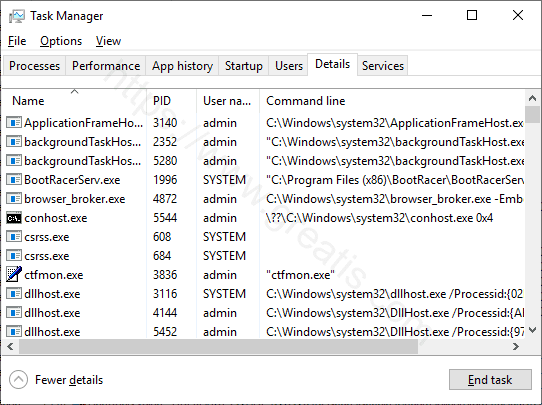
- Open Task Manager and close all unused programs.
Use the Details tab in the Task Manager.
Customize columns to display the "Command line".
Virus programs often use random filenames. - Delete virus scheduled tasks.
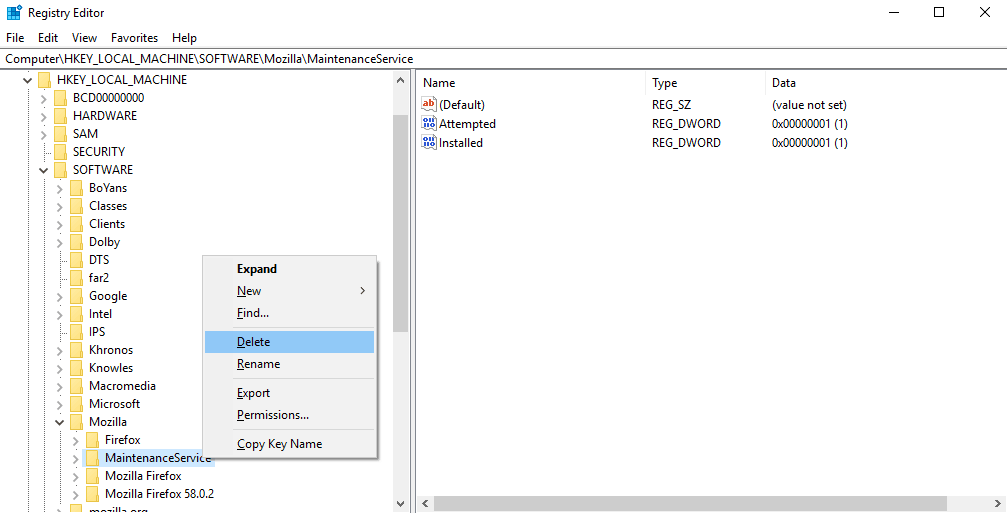
- Find and delete all keys with virus name in it's content.
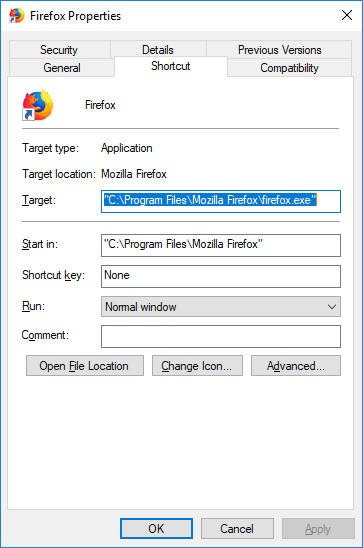
- After that, check the shortcuts of your browsers on having additional addresses at the end of the command line. Check if shortcuts run the actual browser and not the fake ones. Remember: Chromium is a fake browser, the real name has to be Chrome.
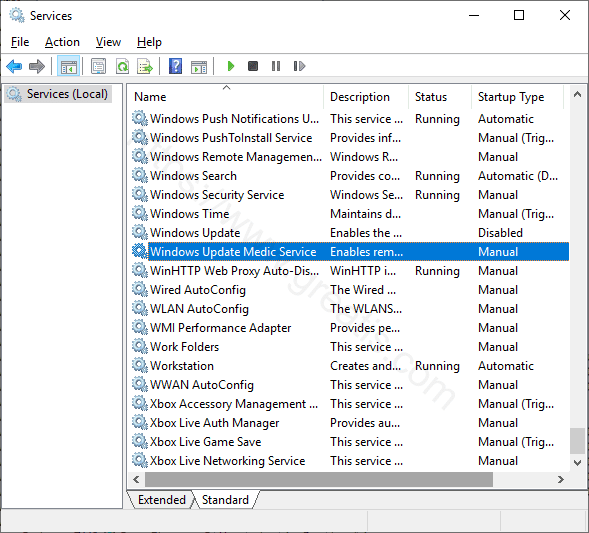
- Stop and disable unknown services. Be careful! Do it only if you are fully sure that you do!
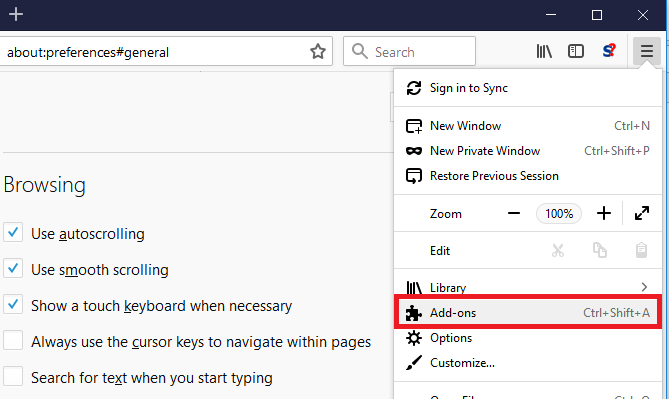
- Remove all unused extensions (or plug-ins) in your browsers. If it does not help, you need totally reset your browser.
- Next, you have to check your DNS settings. Follow your provider's instructions, delete all unknown DNS addresses.
More info...
More info...
More info...
More info...

More info...
More info...
More info...
More info...
- STEP1: Remove the SSLLINK.NET website from Chrome.
- STEP2: Remove the SSLLINK.NET virus from Android Core.
- STEP3: Remove the SSLLINK.NET virus using Malwarebytes Antimalware.
- STEP4: Protect against the virus using AdGuard.
Remove the SSLLINK.NET website from Chrome on Android
- Open Chrome. Go to the main menu.
- Tap on the Settings.
- Select Notifications.
- Locate a malicious website.
- Switch off Allow notifications for the site.
- Return to Site Settings.
- Tap All Sites.
- Locate a malicious website.
- Tap the Clear & Reset button.
- Return to Chrome Settings.
- Tap the Homepage.
- Set your preferred homepage.
Remove the virus from Android Core
- STEP1: Remove Suspicious Applications.
- STEP2: Activate Google Play Protect
- STEP3: Clear your cache and downloads
- STEP4: Restart your Android phone in Safe Mode
- STEP5: If nothing helps, reset your phone
Remove Suspicious Applications
- Open Settings.
- Go to the App Management.
- Tap Auto-launch apps.
- Uncheck all suspicious apps.
- Get back to the App List.
- Tap on the application name.
- Tap Uninstall.
Activate Google Play Protect
- Open Settings.
- Tap Security.
- Choose Google Play Protect.
- Activate Google Play Protection.
Clear your cache and downloads
- Open Settings.
- Go to the Apps List.
- Locate the Chrome.
- Tap Storage usage.
- Tap Clear Cache and Clear Data.
Restart your Android phone in the Safe Mode
if the Safe Mode is available.
- Press and hold the Power button.
- Choose the Safe Mode option.
- Restart your phone.
If nothing helps, reset your phone
- Open Settings.
- Tap Additional Settings.
- Choose Backup and Reset. You can use the search to find Reset.
- Choose Erase all data (factory reset) and then tap Erase all data.
Remove the virus using Malwarebytes for Android
- Download Malwarebytes for Android.
Download Malwarebytes - Install Malwarebytes for Android on your phone.
- Open Malwarebytes for Android.
- Tap the Give Permissions button to set the permissions required for the scan.
- Toggle on Allow access to all files to allow Malwarebytes to access your files and folders.
- Tap Run a scan.
- Tap on Remove Selected to fix the threats.
- Restart your phone.
Protect your computer against the "SSLLINK.NET" problem using AdGuard Ad Blocker
Adguard Ad Blocker:- Blocks all kinds of ads
- Removes annoying web elements
- Saves traffic and speeds up page loading
- Works for browsers and apps
- Maintains site functionality and appearance
- Download AdGuard
Download Adguard - - For Android 8+: start downloading AdGuard apk (see next step), you'll be prompted to allow permission. Tap Settings in the opened window and enable Allow from this source switch. Then resume the installation.
- For Android 6 and 7: open Settings, then select Additional settings in System & Device. Switch on Unknown sources and press OK in the system warning window.
- For Android 5: open Settings, then select Security in the Personal section. Switch on Unknown sources and press OK in the system warning window. - You can now install the app on your device. Start the browser and type in the following URL: https://adguard.com/apk.
- You will see the request to save the downloaded file. Press OK.
- When the download is complete, the system will ask you if you want to install the AdGuard app. Press Install.
- Accept he License agreement and AdGuard's Privacy Policy. You can also participate in product development. To do this, you should check boxes Send automatic crash reports and Send technical and interaction data. Tap Accept after that.
- Then you'll need to choose between a Quick and Thorough set-ups.
- The first one will ask you to enable local VPN which is required for AdGuard to function.
- The latter starts a first launch sequence to configure the app to suit your needs. First, you will be asked whether you want to enable search ads.
- The next step is to block or keep social widgets (e.g "Like" buttons):
- Next is Annoyances: cookie notifications, support windows etc.
- Up next is privacy settings. Choose a desirable protection level: Comfortable, High, Ultimate or No Protection.
- Choose the Security Warnings setting.
- Accept installing HTTPS filtering.
- Final step: click Create Local VPN.
- STEP1: Remove the SSLLINK.NET website from Safari.
- STEP2: Remove the SSLLINK.NET virus-related applications and agents.
- STEP3: Remove the SSLLINK.NET virus using Malwarebytes Antimalware.
- STEP4: Protect against the virus using AdGuard.
Remove the SSLLINK.NET website from Safari
- In the Safari application, choose the menu Safari, Preferences.
- Click Websites, then click Notifications.
- Find the website in the list, then select Deny
- Choose the General tab on the Safari Preferences.
Set your preferred Homepage setting. - Switch to the Search tab.
Set your Search Engine setting. - Choose the Extensions tab.
Remove unknown extensions.
Remove the SSLLINK.NET virus from Mac OSX
- STEP1: End Virus-related Processes
- STEP2: Remove Unwanted Login Items
- STEP3: Remove Unwanted Applications
- STEP4: Remove Auto-Launch Daemons and Agents
- STEP5: Empty the trash bin and reboot your Mac
STEP1: End Virus-related Processes
- Use the Launchpad to open the Activity Monitor application.
- Locate the suspicious apps in the list.
- Close the processes using the [x] button.
STEP2: Remove Unwanted Login Items
- Go to the Mac System Preferences.
- Click the Users & Groups.
- Select your profile on the user's list, then choose the Login Items tab.
- Use the [-] button to remove the apps from Mac startup.
STEP3: Remove Unwanted Applications
- Open the Finder application.
- Choose the Applications folder.
- Select unwanted applications.
- Right-click on it and click Move to Trash in the popup menu.
STEP4: Remove Auto-Launch Daemons and Agents:
- Open the Finder application.
- Open in the menu Go, Go to Folder...
- Copy and paste: Library/LaunchAgents.
- Press the Enter key.
- Remove unwanted launch agents by dragging them to the Trash.
Repeat the same procedure for All User Launch Agents.
Go to the folder: ~/Library/LaunchAgents/ if it exists.
Repeat the same procedure for Launch Daemons.
Go to the folder: /Library/LaunchDaemons/ if it exists.
STEP5: Empty the trash bin and reboot your Mac
- Click on the Trash icon in the Dock and choose Empty Trash.
- Go to the Mac main menu and click Restart.
Remove the virus using Malwarebytes Antimalware
- Download Malwarebytes for Mac Download Malwarebytes
- Double-click on the Malwarebytes setup file Malwarebytes-MacXXX.pkg.
- Follow the on-screen instructions to complete the Malwarebytes installation.
- Click on the Scan button.
Wait for the Malwarebytes scan to complete.
- Click on the Quarantine button to remove the found malware.
- Important: restart the computer to complete the removal.
Protect your computer against the "SSLLINK.NET" problem using AdGuard Ad Blocker
Adguard Ad Blocker:- Blocks all kinds of ads
- Removes annoying web elements
- Saves traffic and speeds up page loading
- Works for browsers and apps
- Maintains site functionality and appearance
- Download AdGuard
Download Adguard - Double-click on the AdGuard icon in the opened installation window.
- You will be warned that this application was downloaded from the Internet. Click Open.
- In the next step, you'll need to click Install.
- Wait for the installer to download the required files.
- Enter the administrator password when propped in the dialogue box and press OK.
- Now, you'll see a quick installation wizard where we will offer you to configure protection to your needs.
- You can either start fine-tuning right away ("Let's do it!") or skip for now ("Leave as it is").
Block SSLLINK.NET website using uBlock Origin
 uBlock Origin is a completely free browser extension, used to block advertising banners and malicious websites.
 Open Google Chrome Web Store if you are using Chrome, Microsoft Edge, or any Chrome-compatible web browser:
Download uBlock Origin for Chrome Click the "Add to Chrome" button.
Use this link for Mozilla Firefox:
Download uBlock Origin Click the "Add to Firefox" button.
uBlock Origin will start automatically blocking adware and malicious sites, scripts, and contents.
![]() Click on the uBlock Origin browser toolbar icon to block the site manually.
Click on the uBlock Origin browser toolbar icon to block the site manually.
Do you have any questions? Need help?
Ask Us a QuestionI recommend you UnHackMe - Ultimate Malware Killer for fast malware removal:
Download UnHackMeFully Functional 30-day Trial. No credit is required. Reviews. EULA. Privacy Policy.